
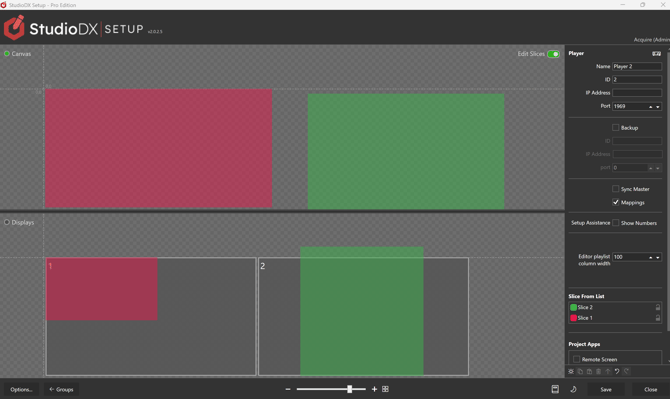
Ensure Mappings is on in the player settings settings, then enable "Edit Slices" in the source work canvas.
The Player will draw content to you sources as defined in the playlist.
Internally this is drawn to an "source canvas" which it then shown on your monitors.
Slices allow you to go a step further and copy a "slice source" (an area on that canvas) to a "slice destination" (an area on a monitor).
Add a slice by clicking on either work canvas and then pressing the "Add" Tool Button ![]() , or right-clicking on the work canvas and selecting from the context menu.
, or right-clicking on the work canvas and selecting from the context menu.
A slice source (area of copied from the sources canvas) is shown in the sources work space, and the slice destination (where that copied area if shown on the monitor) is shown in the monitors work space.
The source, and it destination have the same colour in this app for easy identification.
Slice Source
Move and size the slice source in the work canvas, or in the settings panel.
Give the slice source a unique name.
Tip - To avoid accidental changes, you can lock slice sources in the Slice Sources list.
Slice Destination
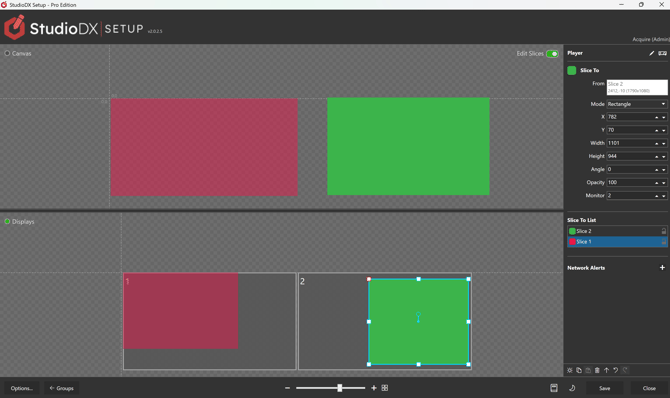
Slice Destinations are right-angled Rectangles by default.
Move, size and rotate the slice destination in the work canvas, or in the settings panel.
You can also set the slice destination's opacity.
All slice destination positions are relative to the monitor that are to be drawn to.
Tip - You can copy\paste a slice destination.
This means one slice source can be pasted to multiple destinations.
Tip - To avoid accidental changes, you can lock slice destinations in the slice destinations list.
Tip - To help with alignment, hold down the control key while moving slice destinations to snap them to the nearest monitor when they are close. This only works with non-rotated slice destinations
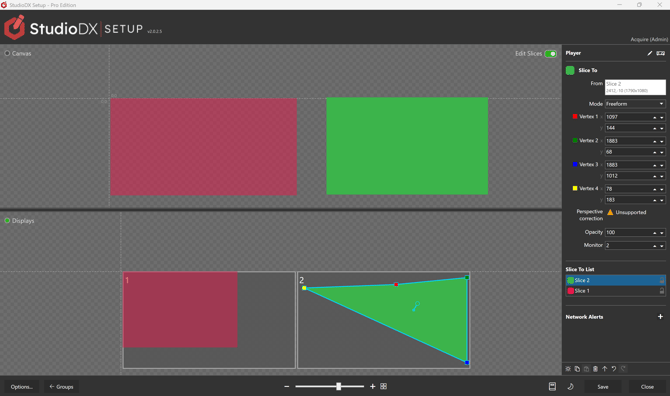
You can change the Mode of the Slice Destination to Freeform.
This allows you to make the slice an irregular quadrilateral by moving its four vertices.
- In this mode holding down the control key while moving the slice, or one of its vertices, will snap vertices to other freeform slice vertices. NB freefrom slices only snap to each other, not to rectangle slices or monitors.
- Snapping vertices together "links" them. Moving a "linked" slice, or one of its vertices, will also move the vertices of other freeform slices it is linked to.
- Holding down the shift key while moving a freeform slice will move all other slices linked to it instead of just moving the linked vertices.
- To "un-link" freeform slices hold down the control key to enter snapping mode while moving the slice or one of its vertices.
- Freeform slices are not allowed to go "bow-tie" shaped (where two sides cross resulting in two triangles).
NB If the selected slice is part of a group of linked slices, and changing it makes another slice in that group go bow-tied, the selected one will become un-linked from that group.