
Unlock the full potential of Acquire StudioDX with a free trial. Follow these simple steps to get started and experience precision-driven, high-performance digital signage software tailored for complex LED displays and large-scale AV environments.
1: Request Your Trial Software & License
Getting started is easy. Simply fill out the form at the link below to request your trial version of Acquire StudioDX.
Download Acquire StudioDX Trial
Once you've completed the form, you’ll receive an email containing everything you need to begin your trial, including download links and licensing information.
Step 2: Download & Install the Editor
Download Your Trial – Click the link in your email to access the download page.
Download the Software – Select 'Download Acquire StudioDX Editor' to download the software package.
Install the Software – Run the StudioDX Suite Installer on your dedicated PC or laptop, accept the license agreement, and follow the on-screen wizard to choose either Primary or Shared Installation.
⚠️ IMPORTANT: THE EDITOR AND PLAYER MUST BE INSTALLED ON SEPARATE
MACHINES, WITH THE PLAYER INSTALLED ON THE UNIT YOU NEED TO CONTROL.
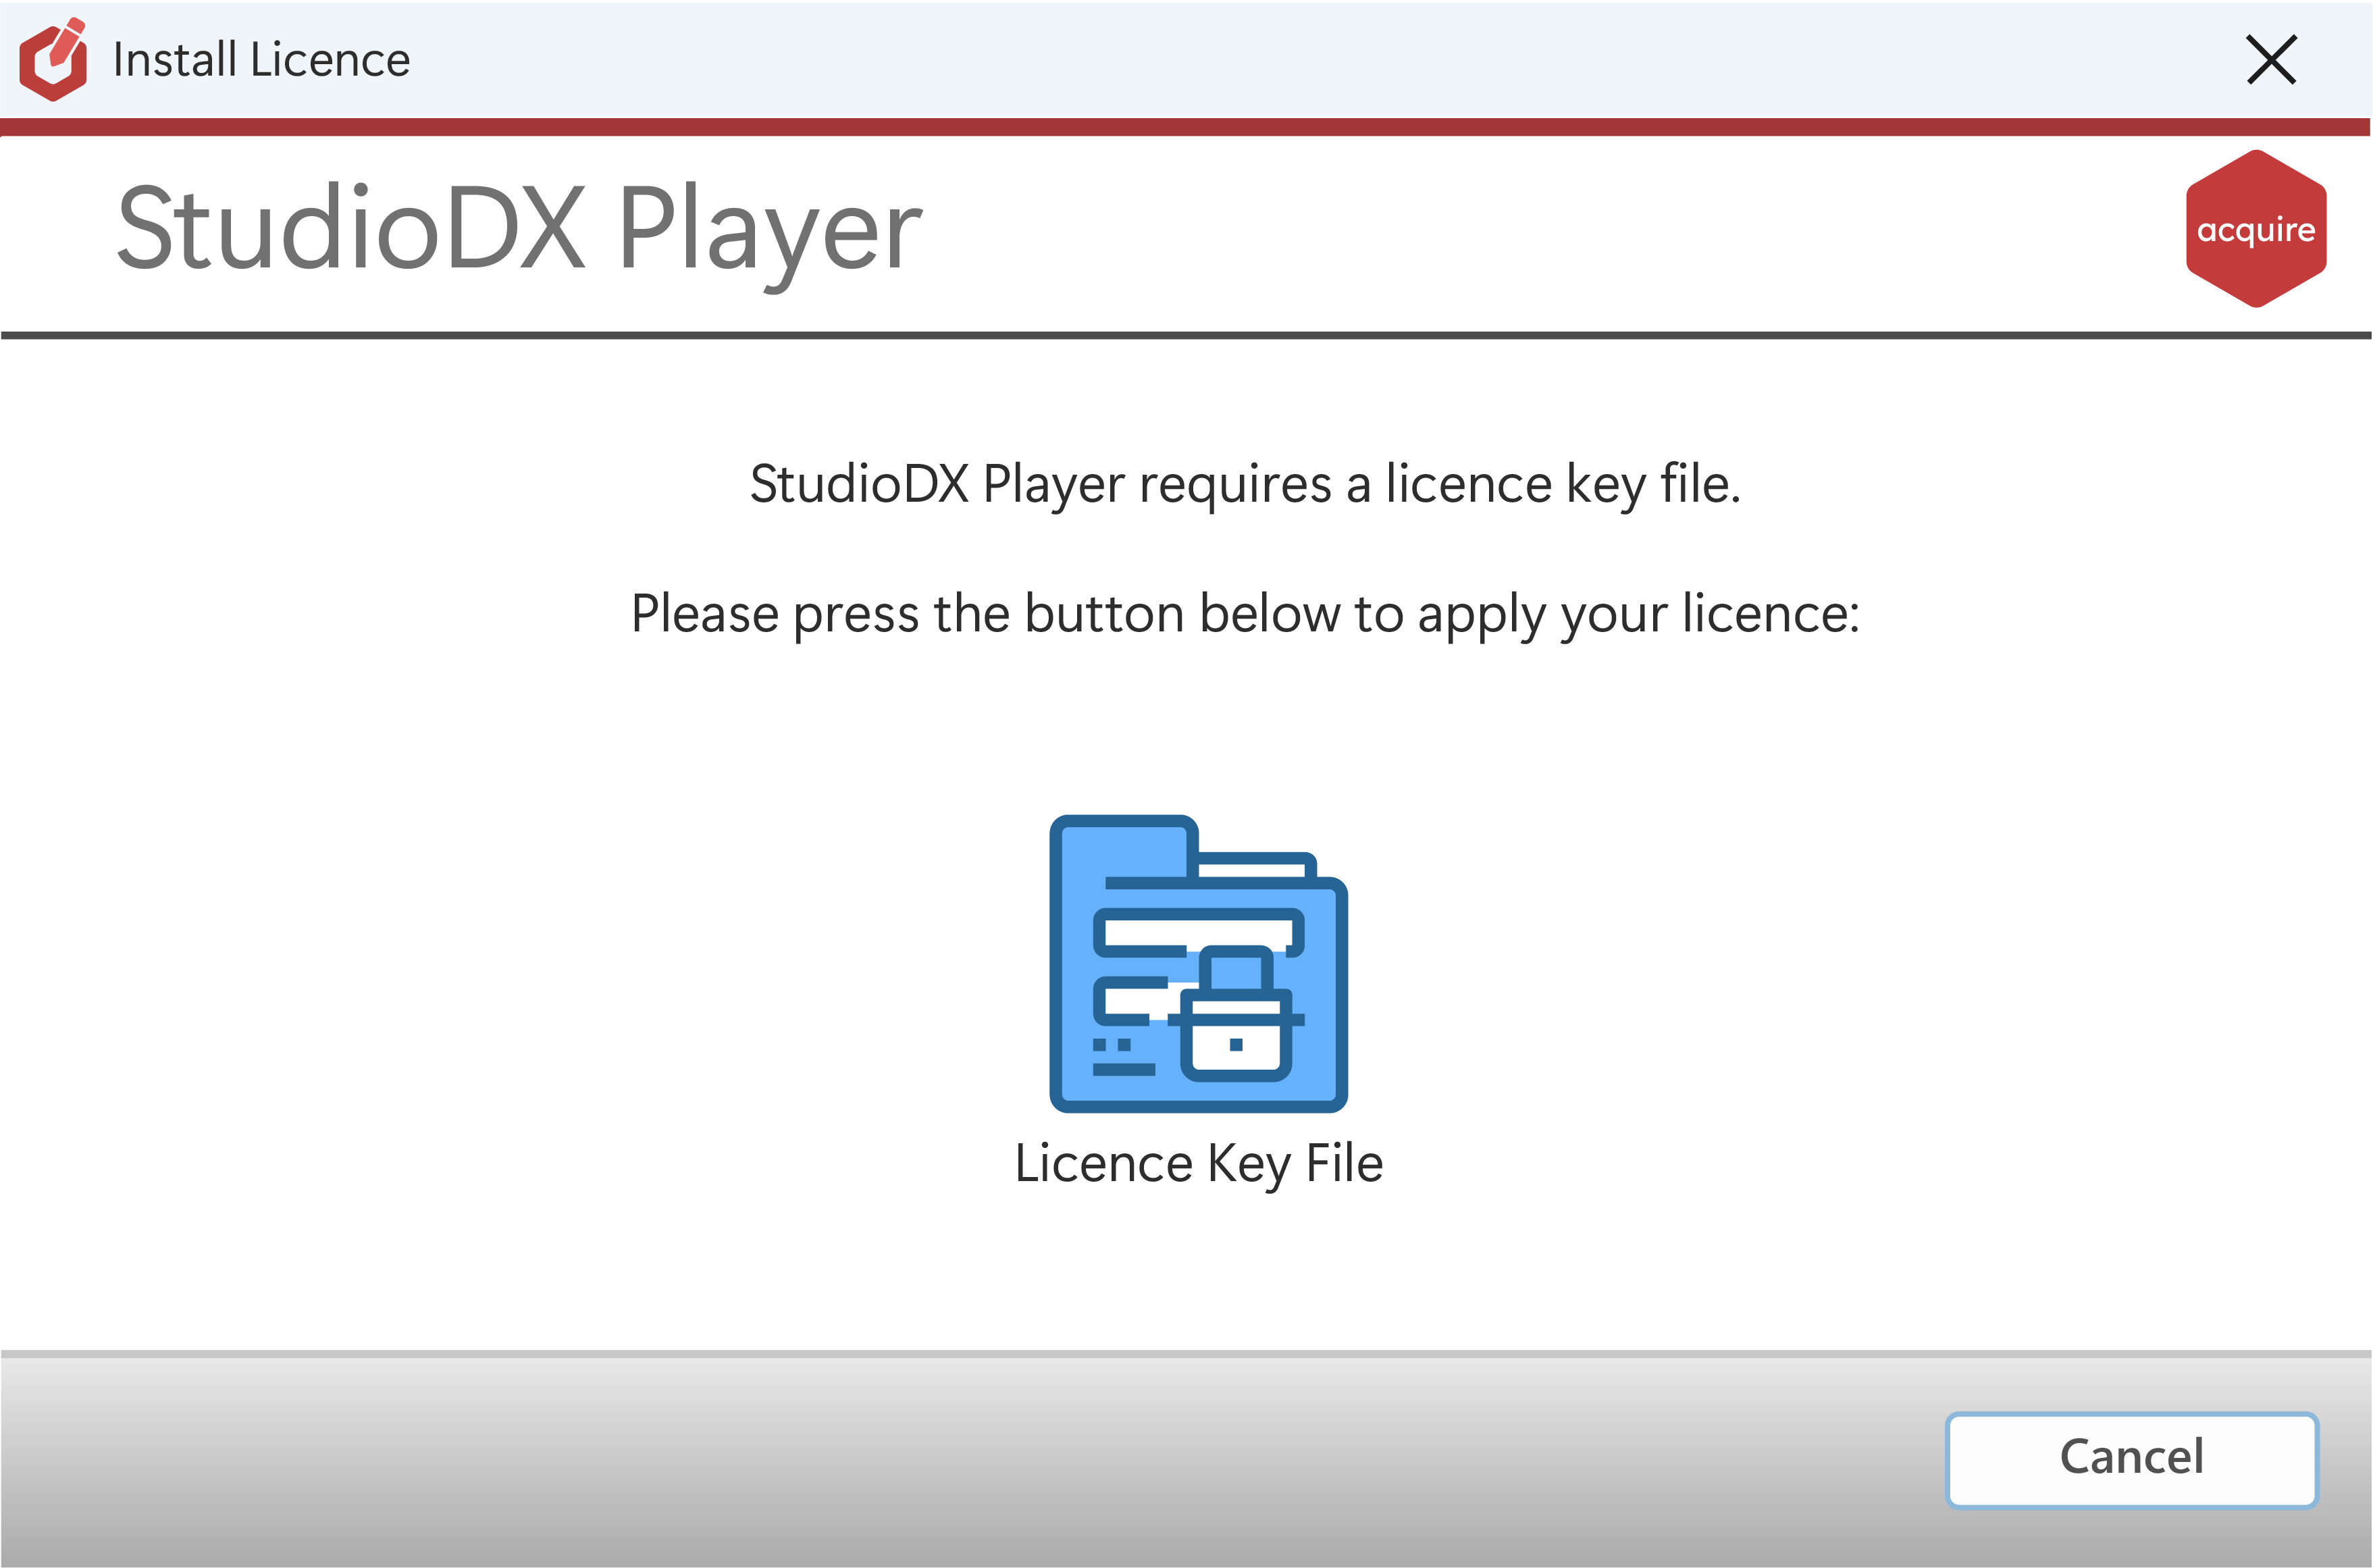
Step 3: Activating Your License
GETTING YOUR EDITOR LICENSE - ‘DOWNLOAD ACQUIRE STUDIODX LICENSE’ TO DOWNLOAD YOUR UNIQUE LICENSE FILE.
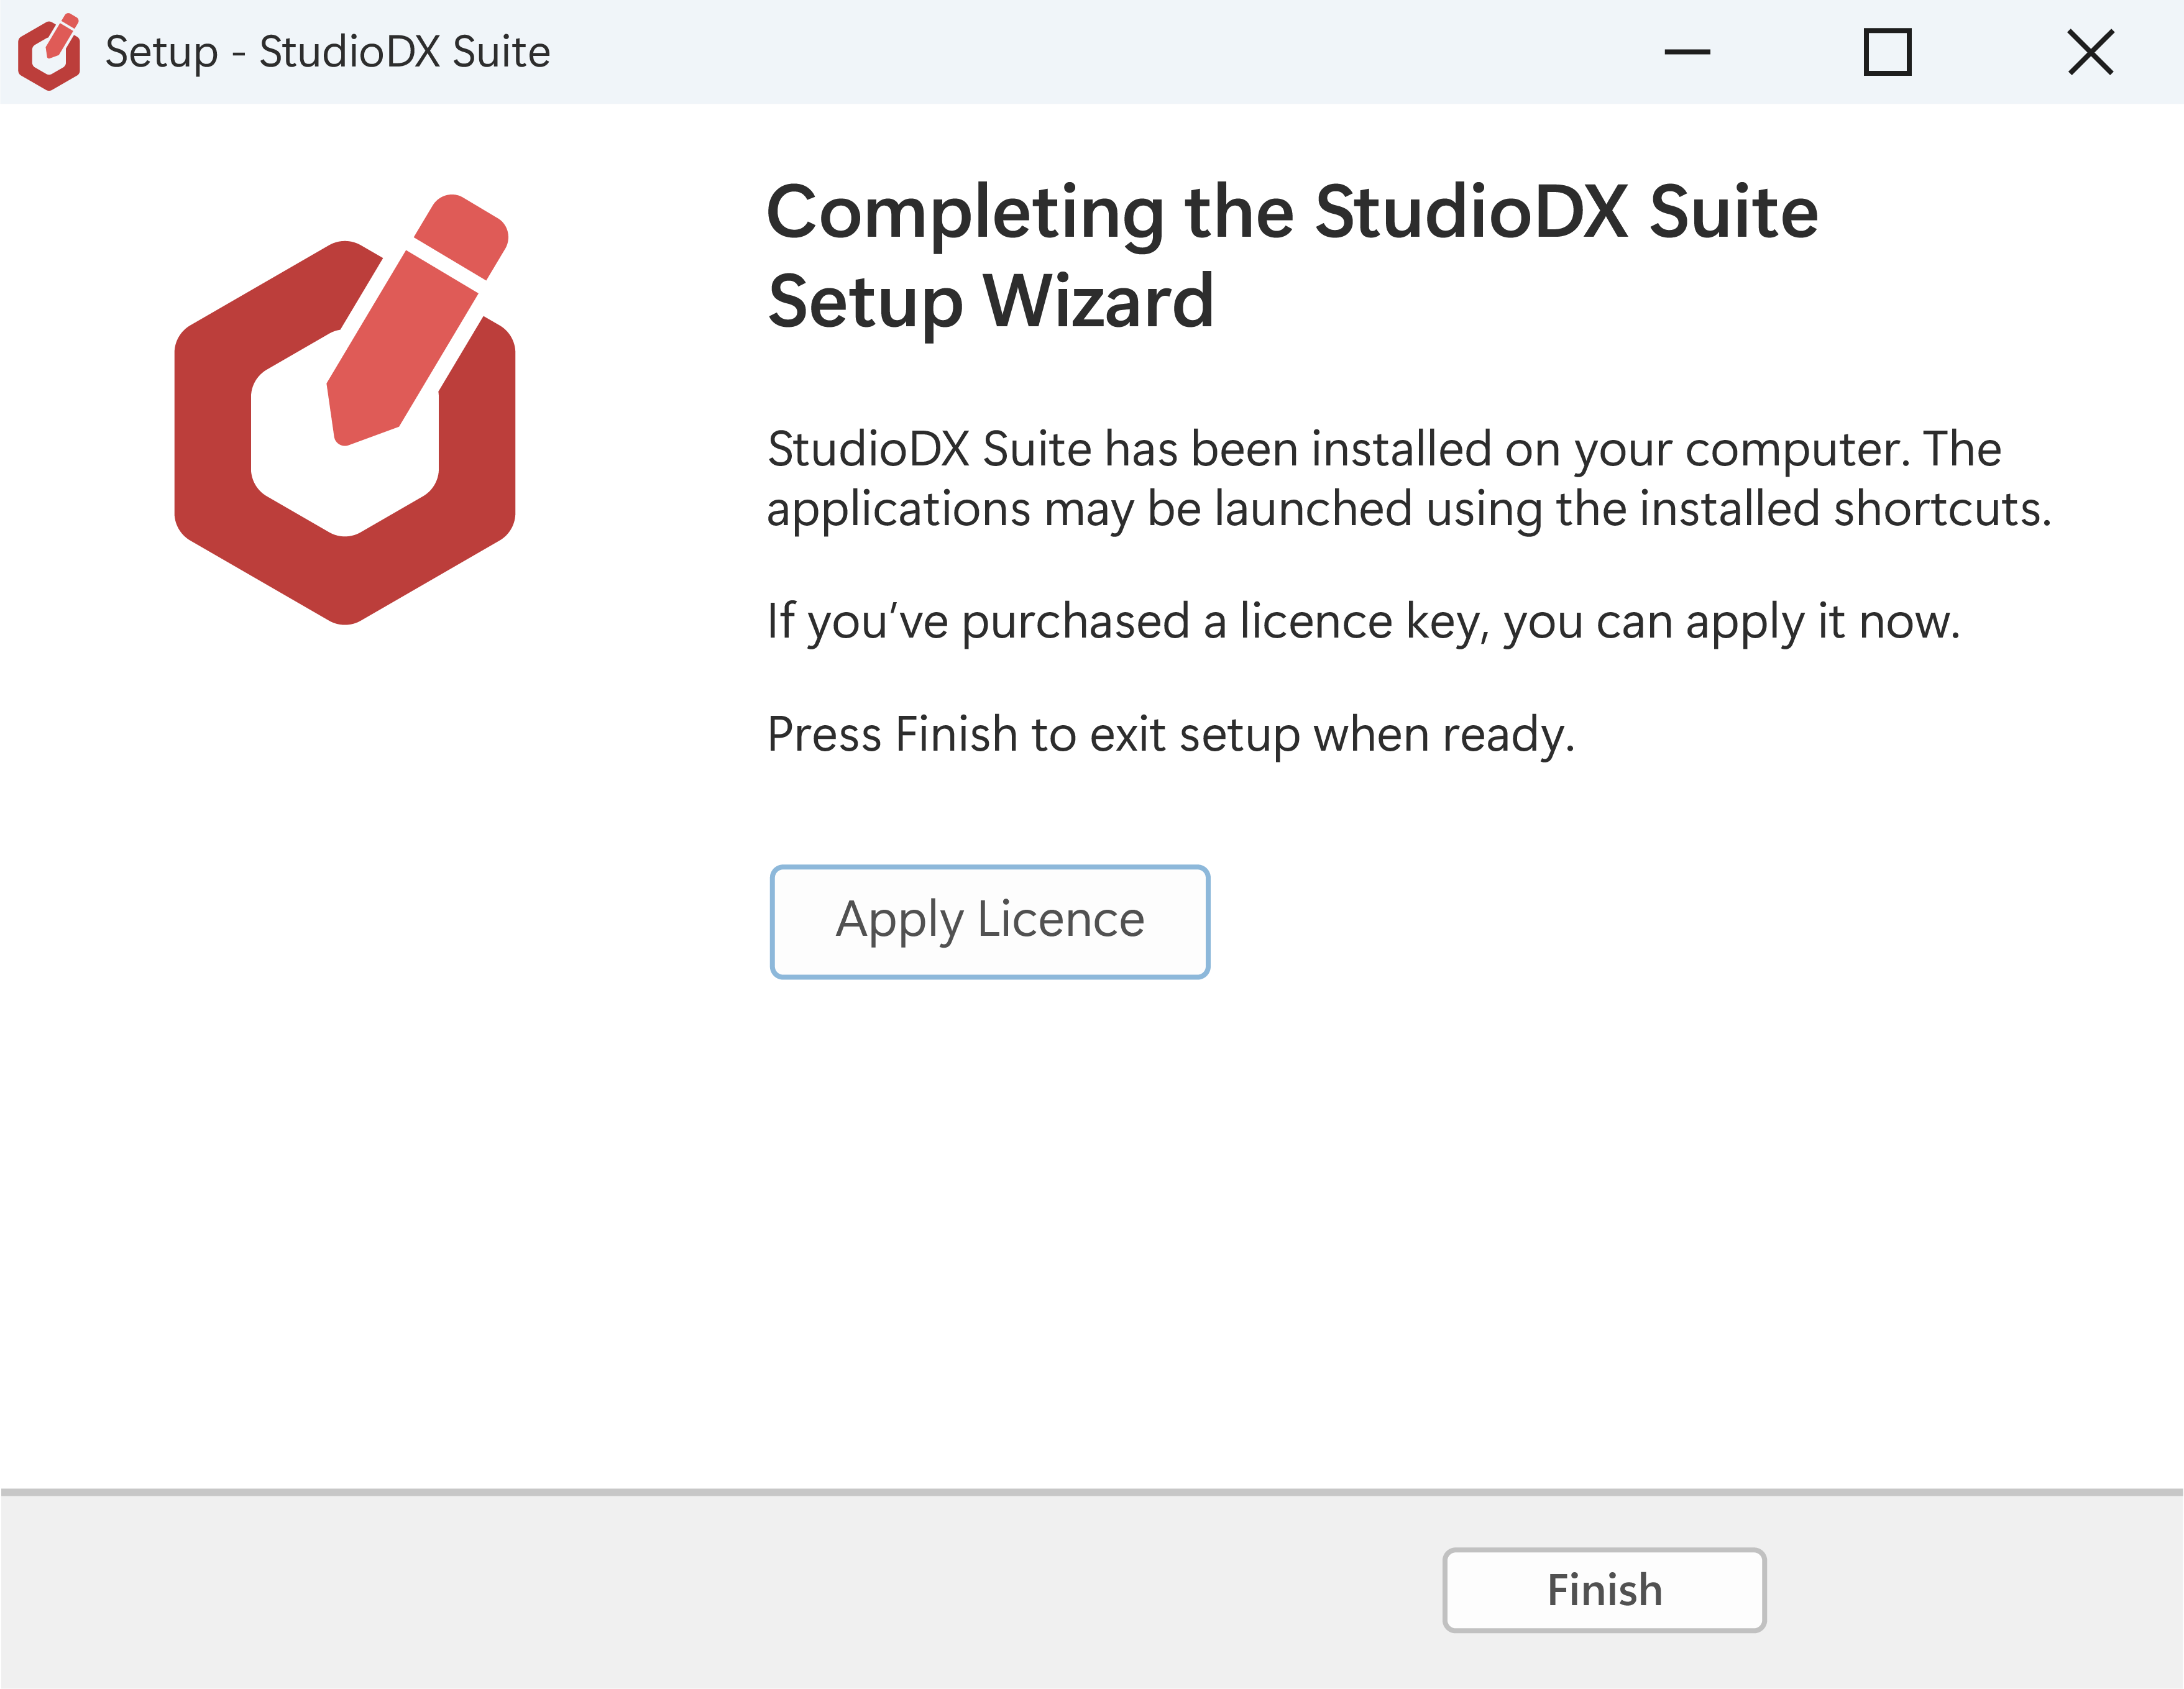
Once installation is complete, click 'Apply License' to open the activation window./
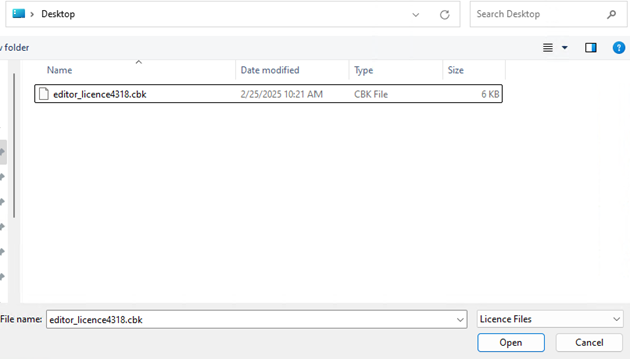
Navigate to where you downloaded your license file and select select the file and 'Open'.
-
i.e. Download Folder.
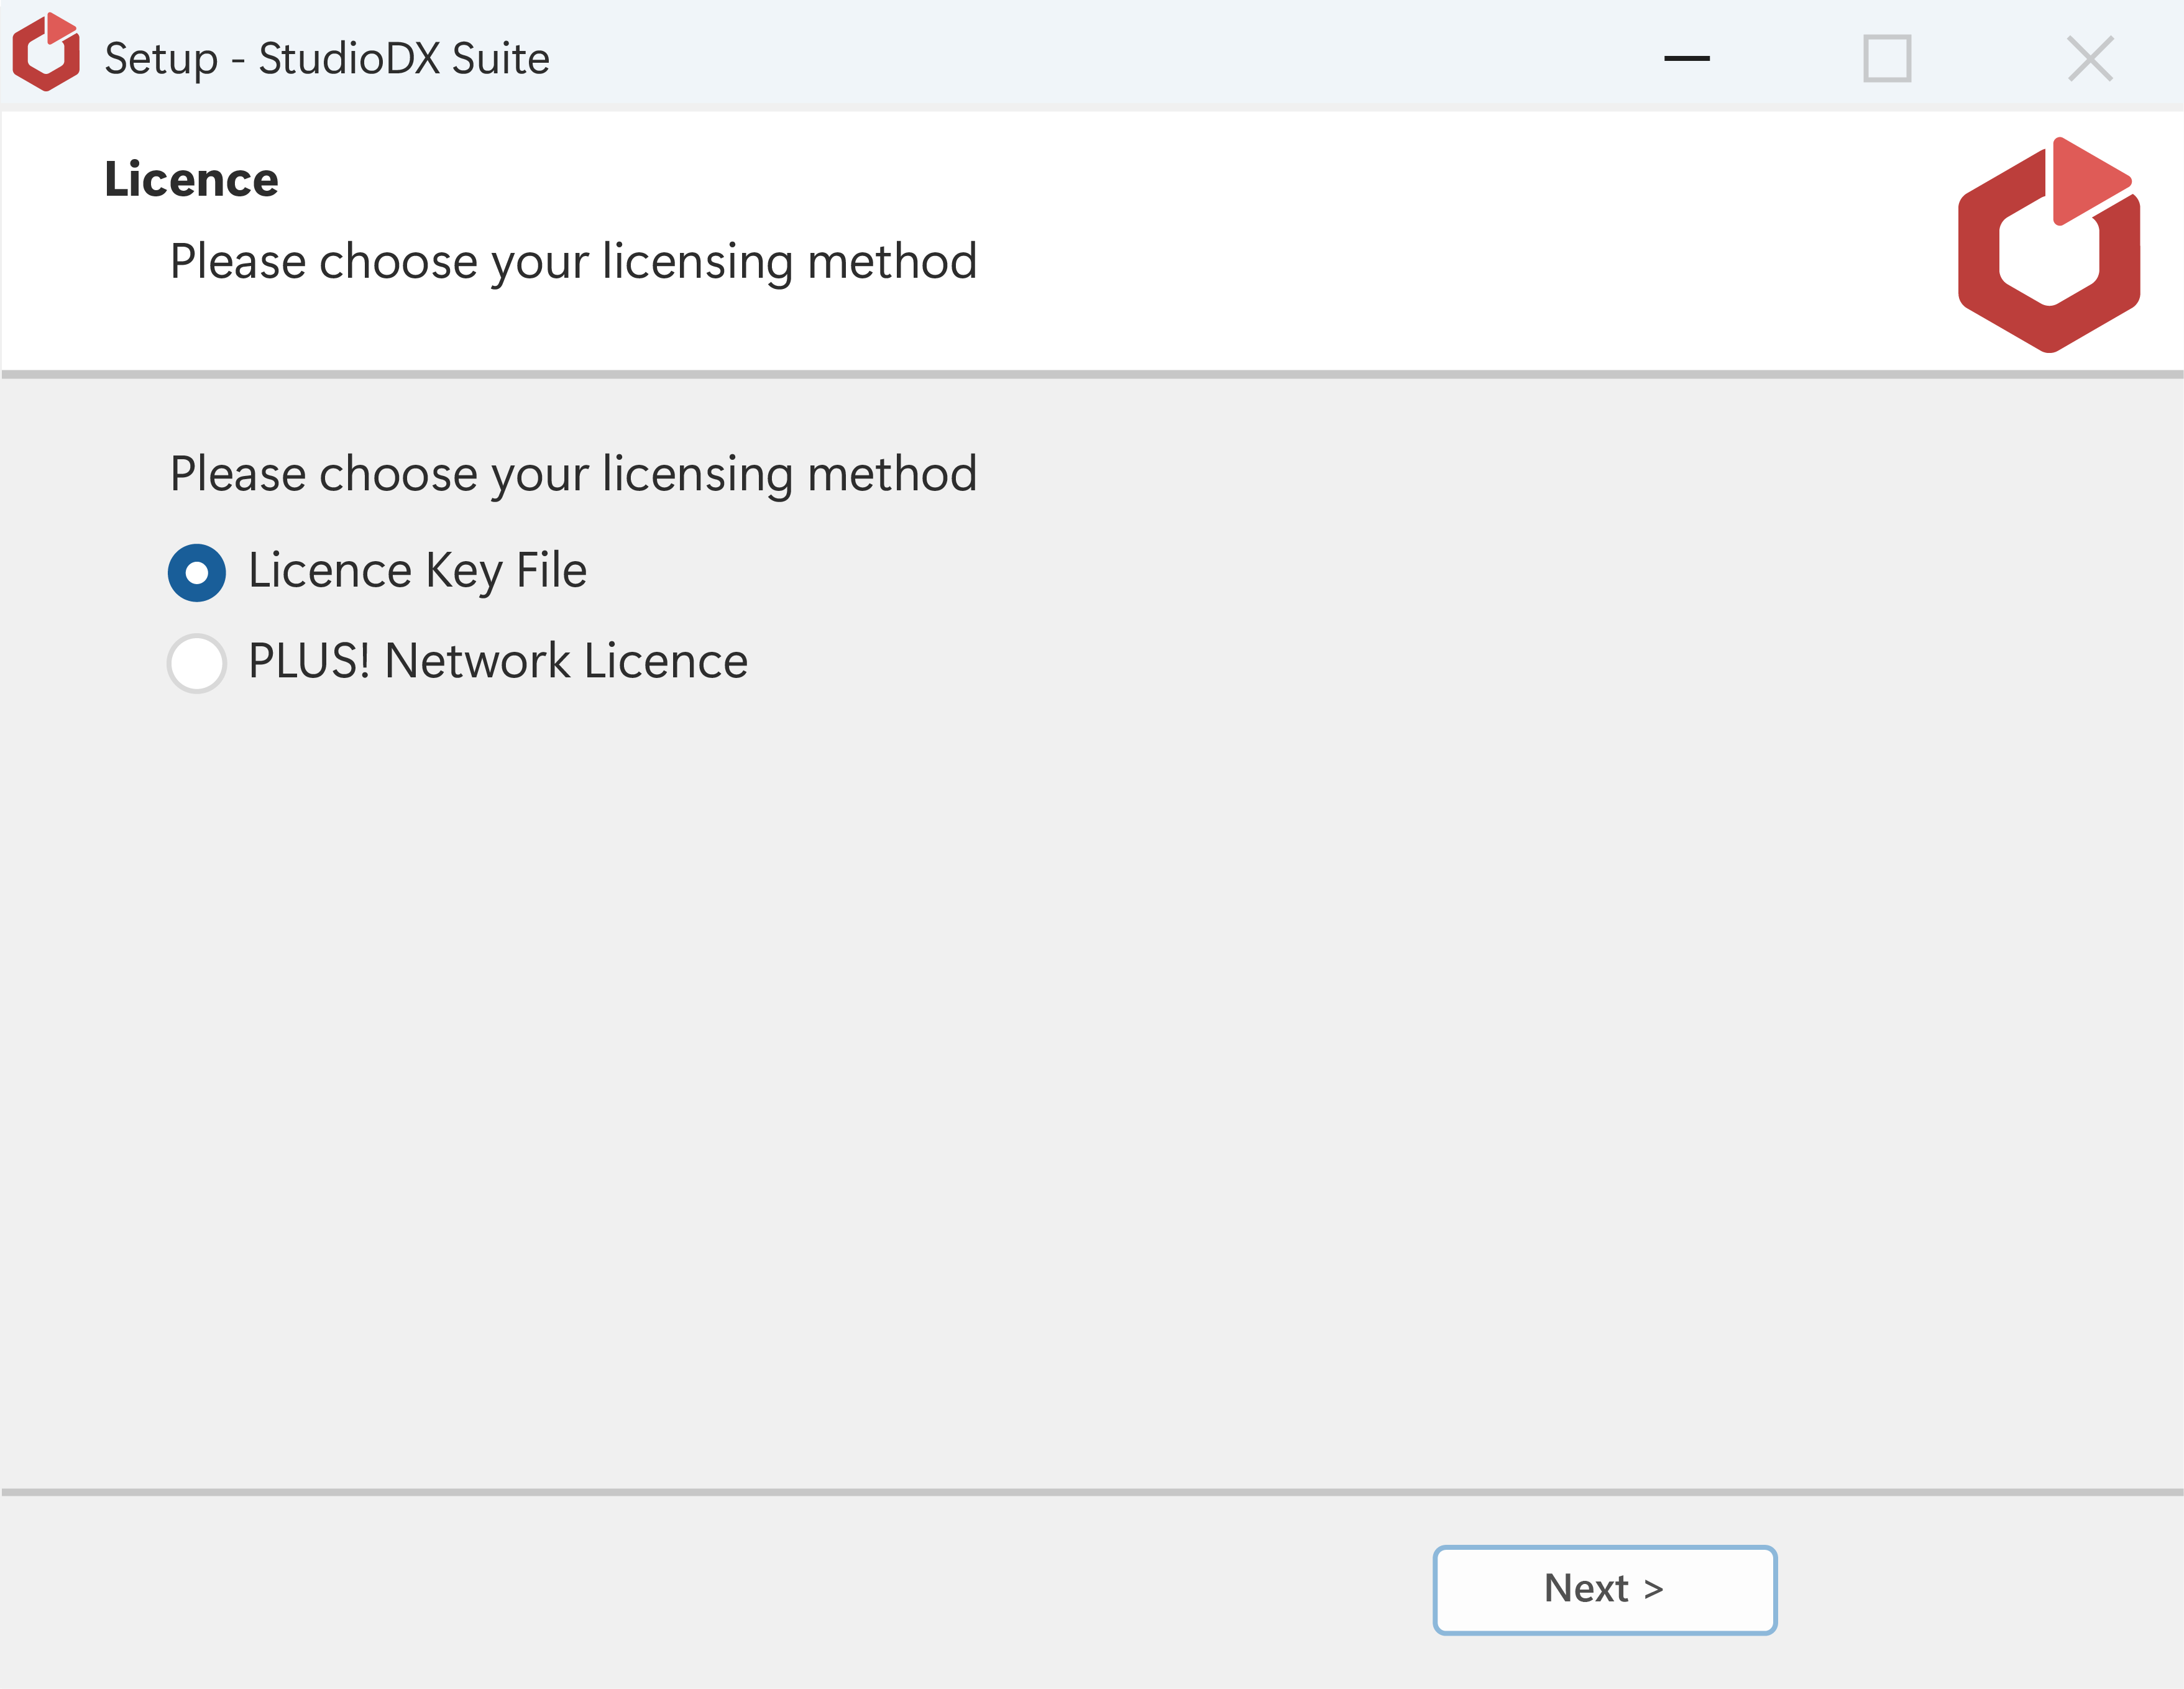
Choose from three activation methods: Recommended:
- Automatically over the Internet – The fastest and easiest way to activate.
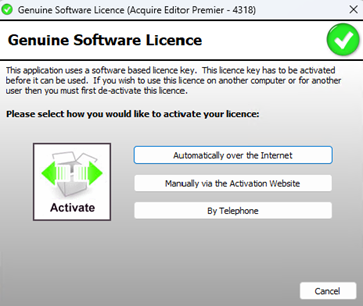
Once activated, a confirmation message will appear: “Your software has now been activated”.

Step 4: Start Creating
Now you’re ready to start designing, managing, and delivering high-quality digital signage content!
Installing the Player Software
💡 To ensure smooth playback and optimal performance, install the Player software on a separate dedicated Player PC.
To test the playback performance, install the player software on a seperate dedicated player Pc.
Download the Software package - 'Acquire DX Player' and 'Licence Key' from your email.
Install the Player Software and follow the same steps as you did with the Editor Software.
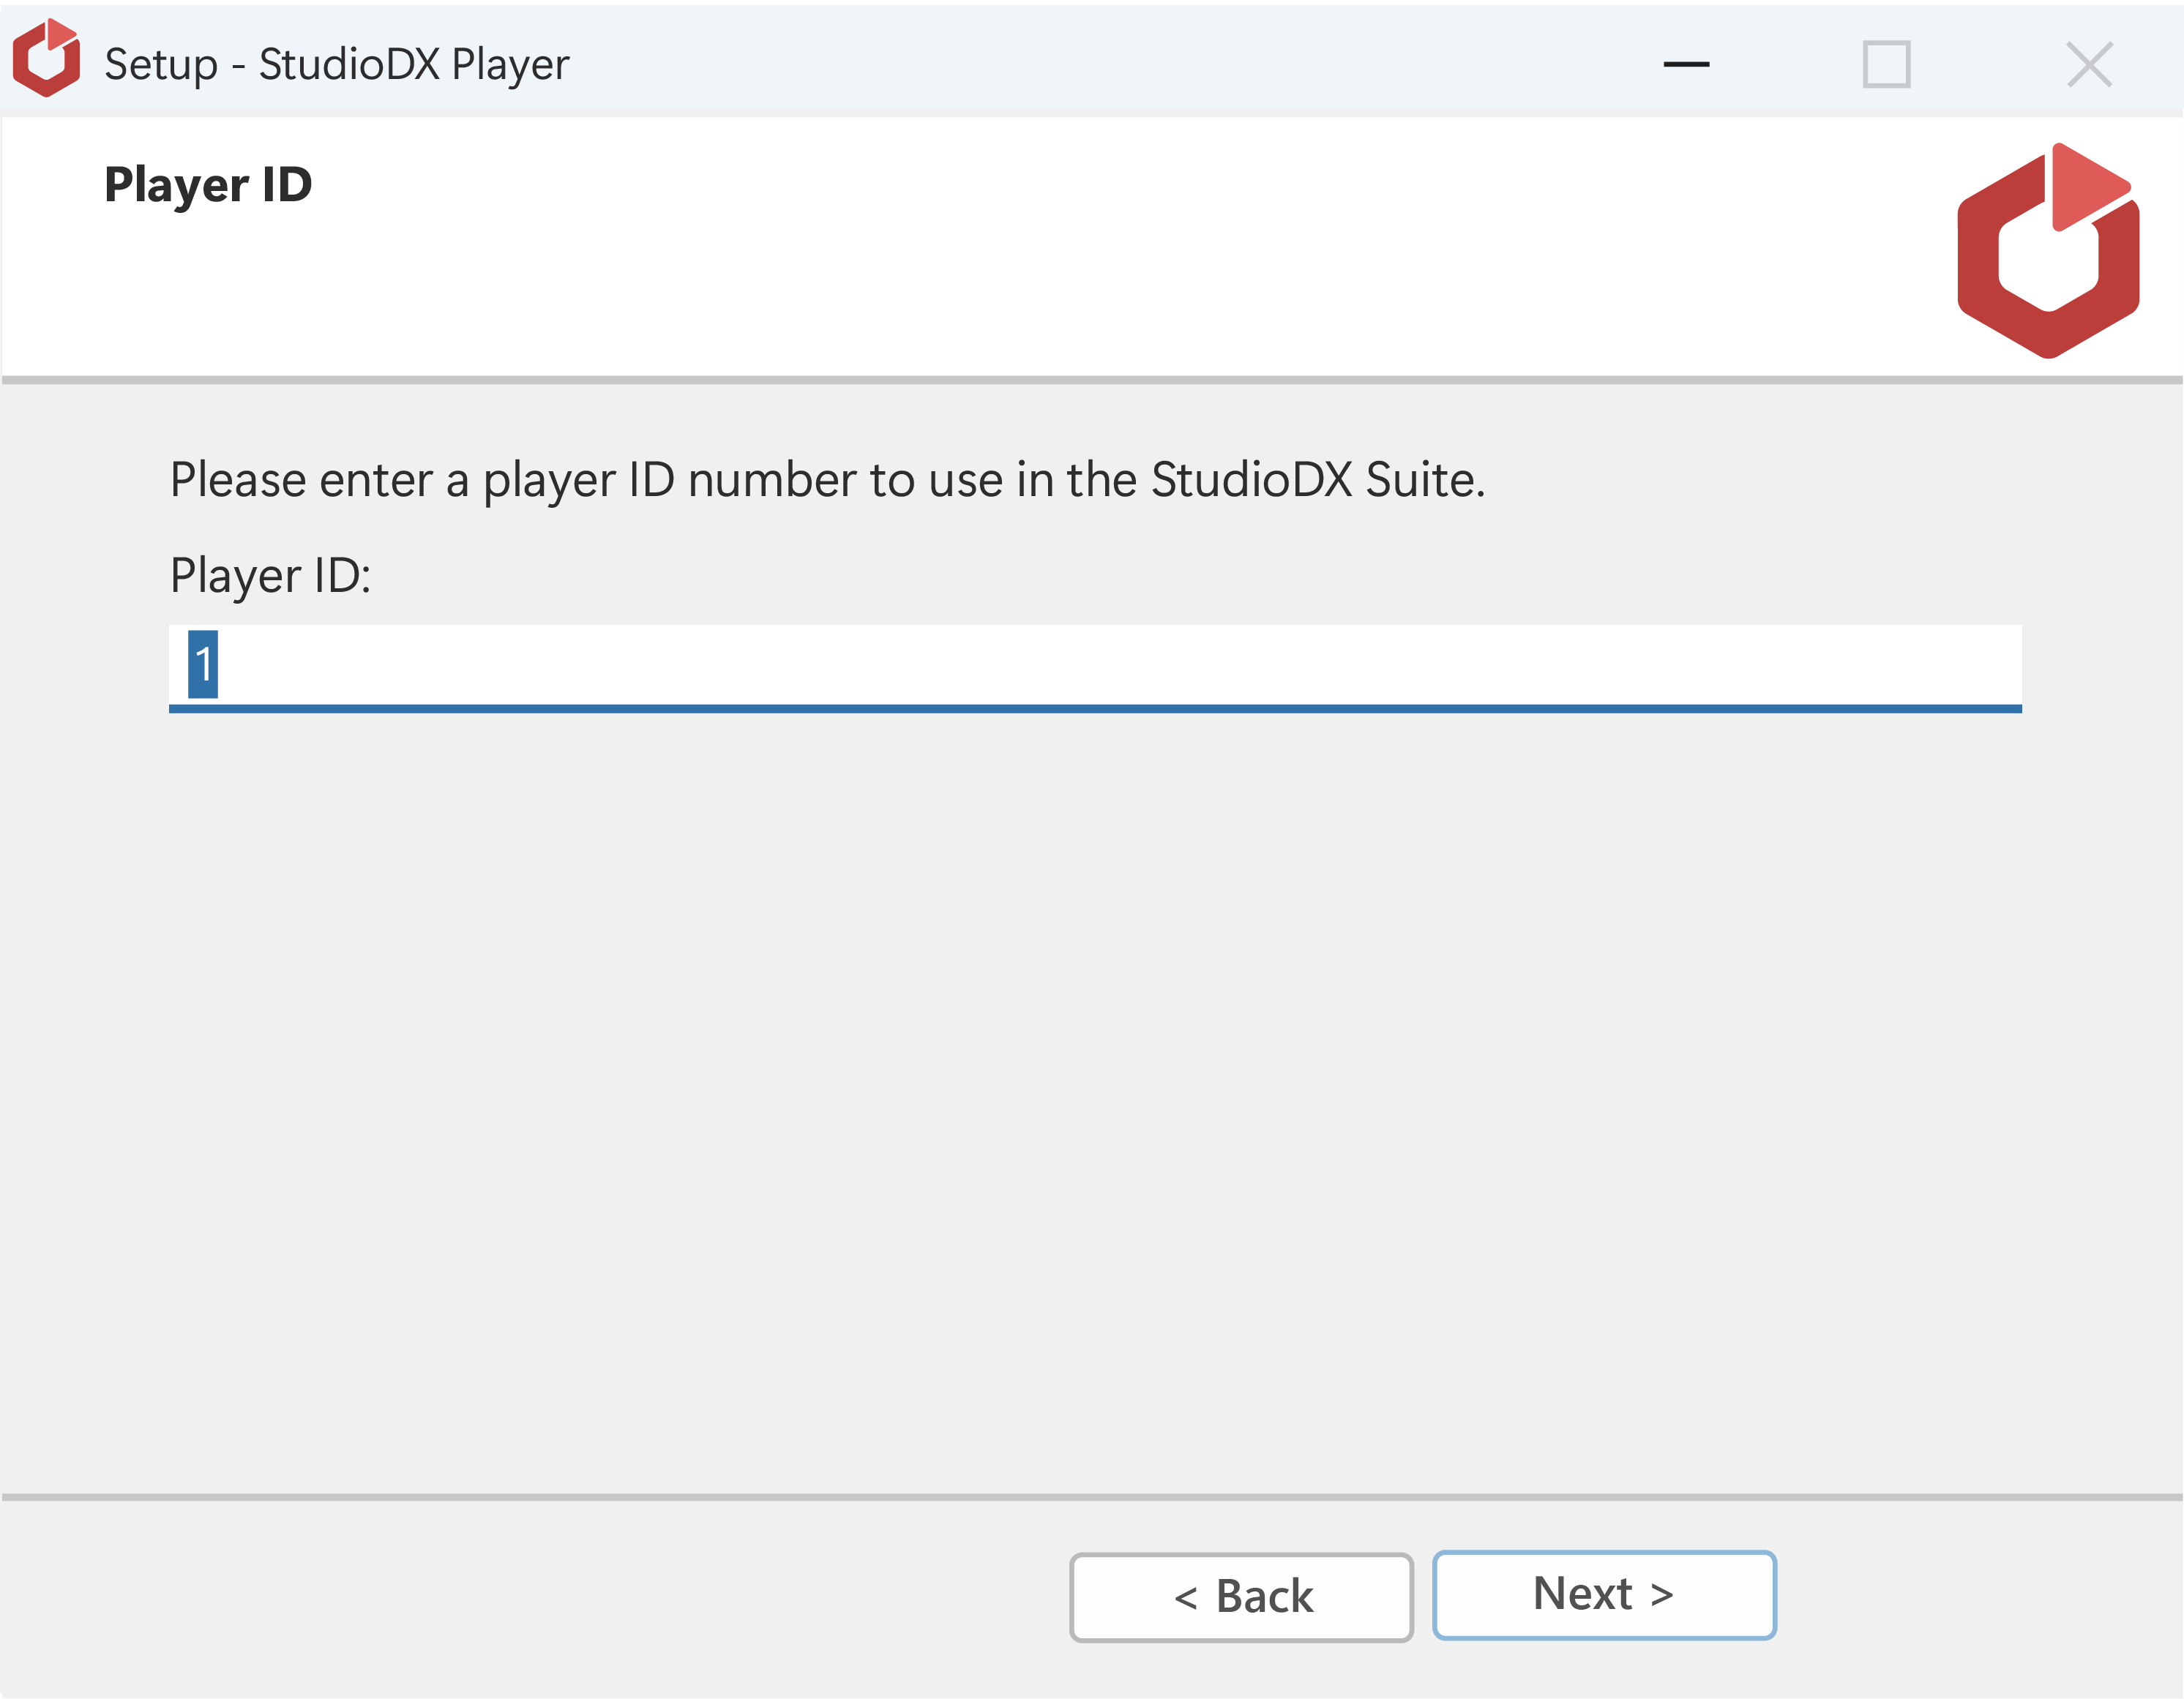
Set the player ID – Default is set to 1.
Complete Activation – Follow the same steps as you did with the Editor Software.
Select restart and the player will Launch.
💡TIP: WHEN INSTALLING THE PLAYER, A MONITORING APP WILL KEEP IT RUNNING IN
THE BACKGROUND. YOU’LL SET A SECRET PASSWORD TO UNLOCK IT—BY DEFAULT, IT IS
SET TO THE ESC KEY FOLLOWED BY THE WORD ‘WATCHDOG’.
⚠️If you have accidently activated the wrong licence key file please contact our support team