A Sender on the Editor connects to a Receiver on the players and sends a project manifest, which contains all the details about the project to deploy.
The player Receiver processes the manifest, creates the project if required, and requests the project files from the Sender. The files are staged (not yet made live) in the player. Once all the files have been staged, they are committed (made live) and the player restarts with the new project.
Configuration
You can Configure Point2Point in the Setup App. Press the Options button then select the Point2Point tab.
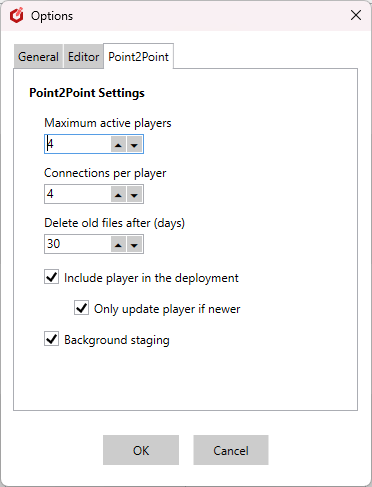
- Maximum active players
How many players are allowed to be deployed to simultaneously.
You can use this, with the option below, to limit bandwidth when deploying to multiple players.
For example, if you set this to 4, fours players will update at once. When one finishes, next player will start. - Connections per player
The number of concurrent file transfer connections each player can use — i.e. the maximum number of files that can be sent at the same time. - Delete old files after (days)
Delete files not required by the project when they are older that this number of days. - Include player in the deployment
Include the player and it dependencies the deployment manifest. - Only update player if newer
Only download the player if its version is newer than the one already got. - Background staging
When the Editor imports media, the files are sent to the players in the background and staged only - they are not yet committed (made live).
This means they are already staged for the next full deploy and will only need committing, rather than downloading again.
Opening Point2Point
In the Editor, press the Deploy... button then select Point2Point to open the application.
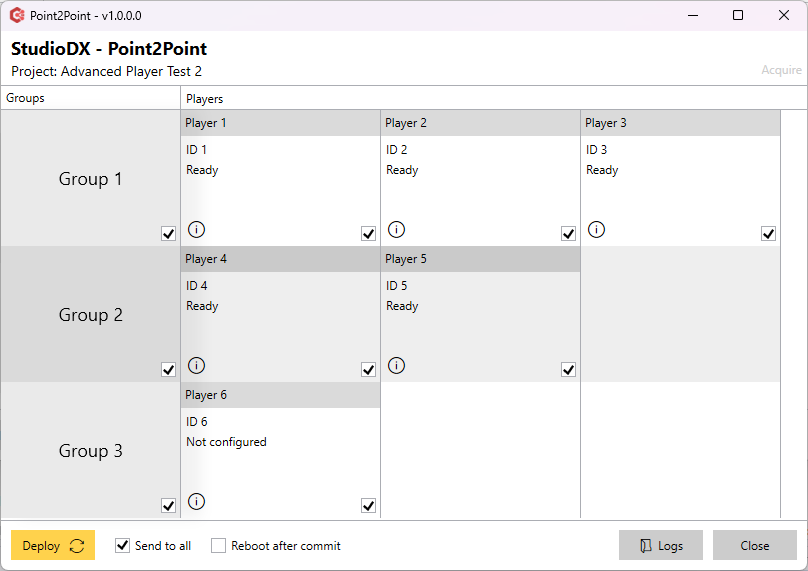
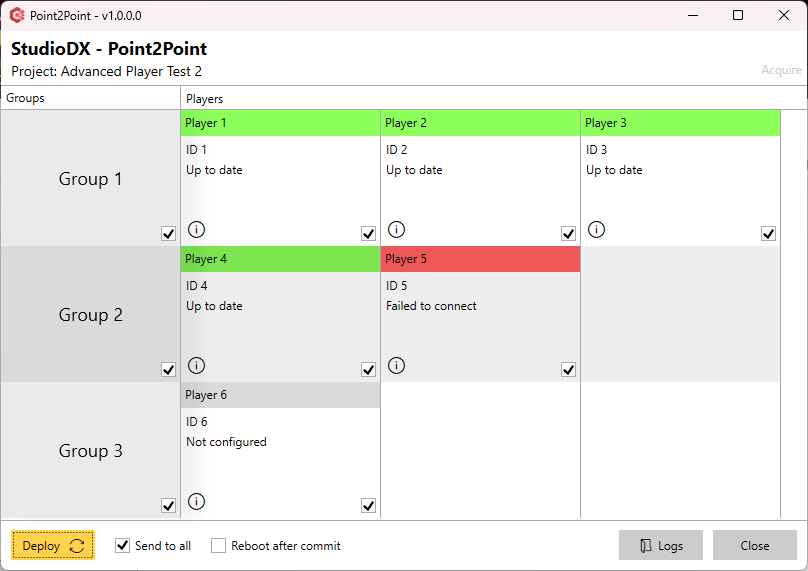
- You will see all the groups available to the logged on user and the players in those groups.
- Players marked "Not configured" mean that no IP Address has been set, so can't be deployed to.
- Use the checkboxes to select the players you wish to deploy to.
The group checkbox toggles all players in that group.
The Send to all checkbox toggles all players in all groups. - If you want to force player PCs to reboot after a successful deploy and once all files are committed, select Reboot after commit. Otherwise the PC will only reboot if necessary e.g. if in-use files can't be replaced without a reboot.
- Press the Logs button to open the folder containing all the deployment logs.
Deploying
When ready press the Deploy button. During deploy the players show progress and status.
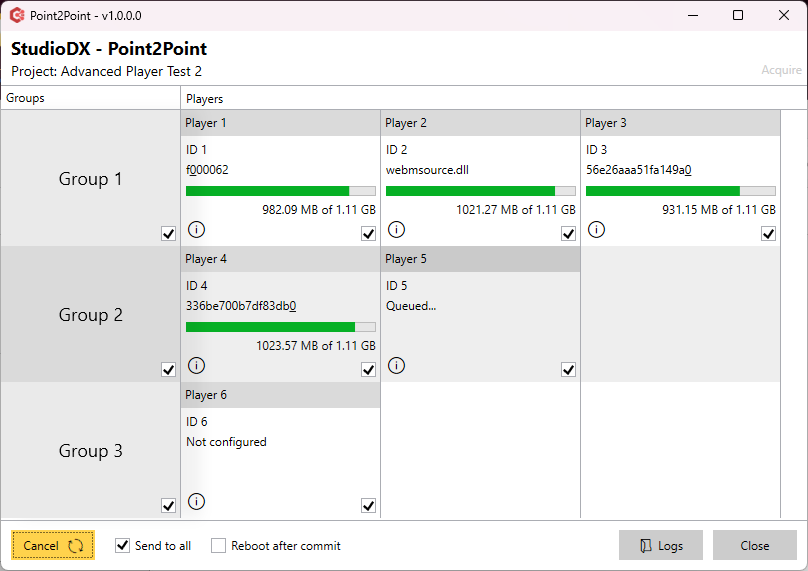
If you press Cancel the files already sent remain staged on the player. So, assuming they don't change, they will be ready for the next time you deploy and won't need re-sending.
Deployment Completion
Once complete the players show the deployment status.
Press the information (i) button to see recent deployment activity for a player:
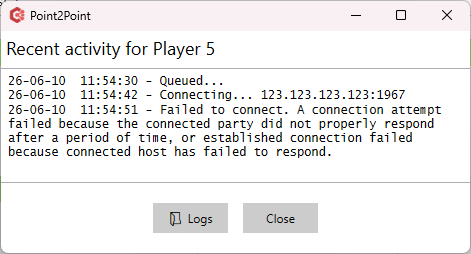
Note that players' recent activity windows are cleared when the application is restarted.
However, all activity is logged to the general Point2Point log file which can be found by pressing the Logs button here or on the main screen.
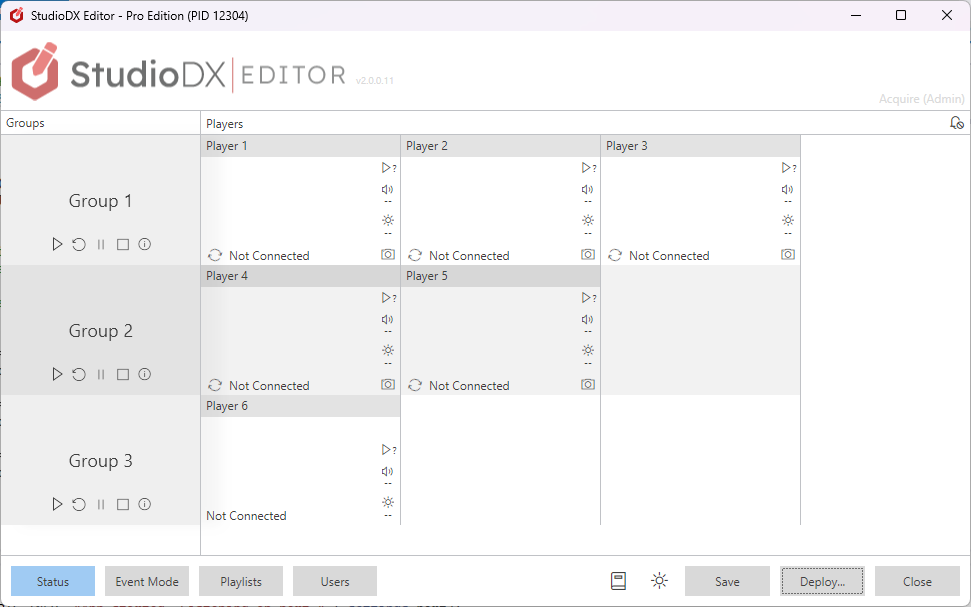
While deploying, the Editor status screen will also show a spinning deployment indicator next to the player status label. This will either hide if the deployment is successful or turn red if it has issues.