
When you close the Group Manager you will be presented with the Acquire Scheduler window which will display the groups that you have just created.
Key
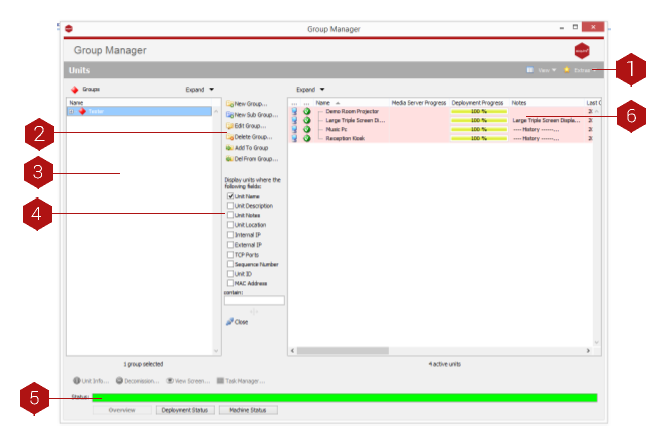
- Online Knowledge Base: Click view and then ‘Knowledge Base’ here to be taken to our Knowledge Base where you will find lots of useful information relating to all aspects of Acquire.
- Group Controls: Create groups and sub-groups, edit groups and delete groups.
- Groups Window: This shows all of the players you have currently grouped. Note that before you can transmit content, you must first add the player to a group. All of the groups and sub-groups can be expanded for more details by pressing the ‘+’ symbol next to them. Note that the current status of each machine is shown by the colour of its screen (Green- player is up to date, Blue - You have changed the playlist but not deployed it, Yellow - new content is being deployed, Red - A fault occurred whilst deploying, check the site manager for details).
- Unit Controls: Display information on your player devices, decommission units and view content playing on your screens.
- Status Bar: Here you can see the deployment status of all of the players on the network in one place. Although all of the players have individual icons showing their status, you can see an overview using this bar. You can also see the deployment status and the status of your machines by selecting the appropriate tab.
- Player Window: Shows all of the players you have had at any time. Some of these may be inactive, but will still show in this window.
After setting up your groups, close the Group Manager and you will be taken to the Scheduler.