
Choose the method you wish to use to send the content.
See: Plus Network in the main Acquire User Guide
The PLUS! Network is an advanced media transfer and delivery system, designed specifically to transfer content to your remote players, and provide a management system to confirm the operability of the players and alert you if there are issues.
Choose PLUS! Network if this is your chosen option. Note that the PLUS! Network is a subscription service and requires and account to be created. If you do not have one of these, contact your reseller or visit www.acquiredigital.com for more information.
You will be asked for your username and password for your account (Note that your user account must have rights for deployment and to use the Scheduler to continue).
You will be logged into the PLUS! Network under the project you have selected (press ‘Yes’ if you are asked if you want to create this project on the PLUS! Network).
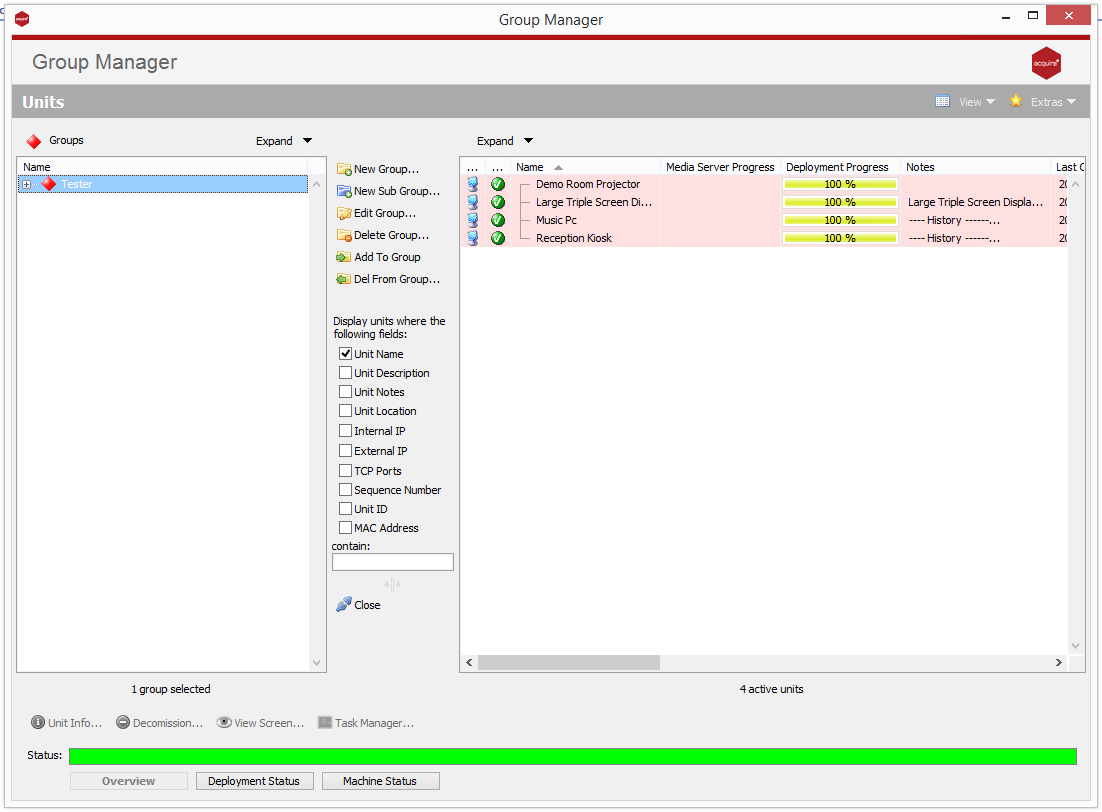
If this is the first time you have used the Schedule with this project, the Group Manager will automatically open, otherwise press ‘Group Manager’ to access it. Using the Group Manager, create Groups and Sub-groups which will help you categorise your players to easily find them and choose content to play on them. Add the players into the appropriate groups and sub-groups. Press Close when you have done this to return to the Scheduler.
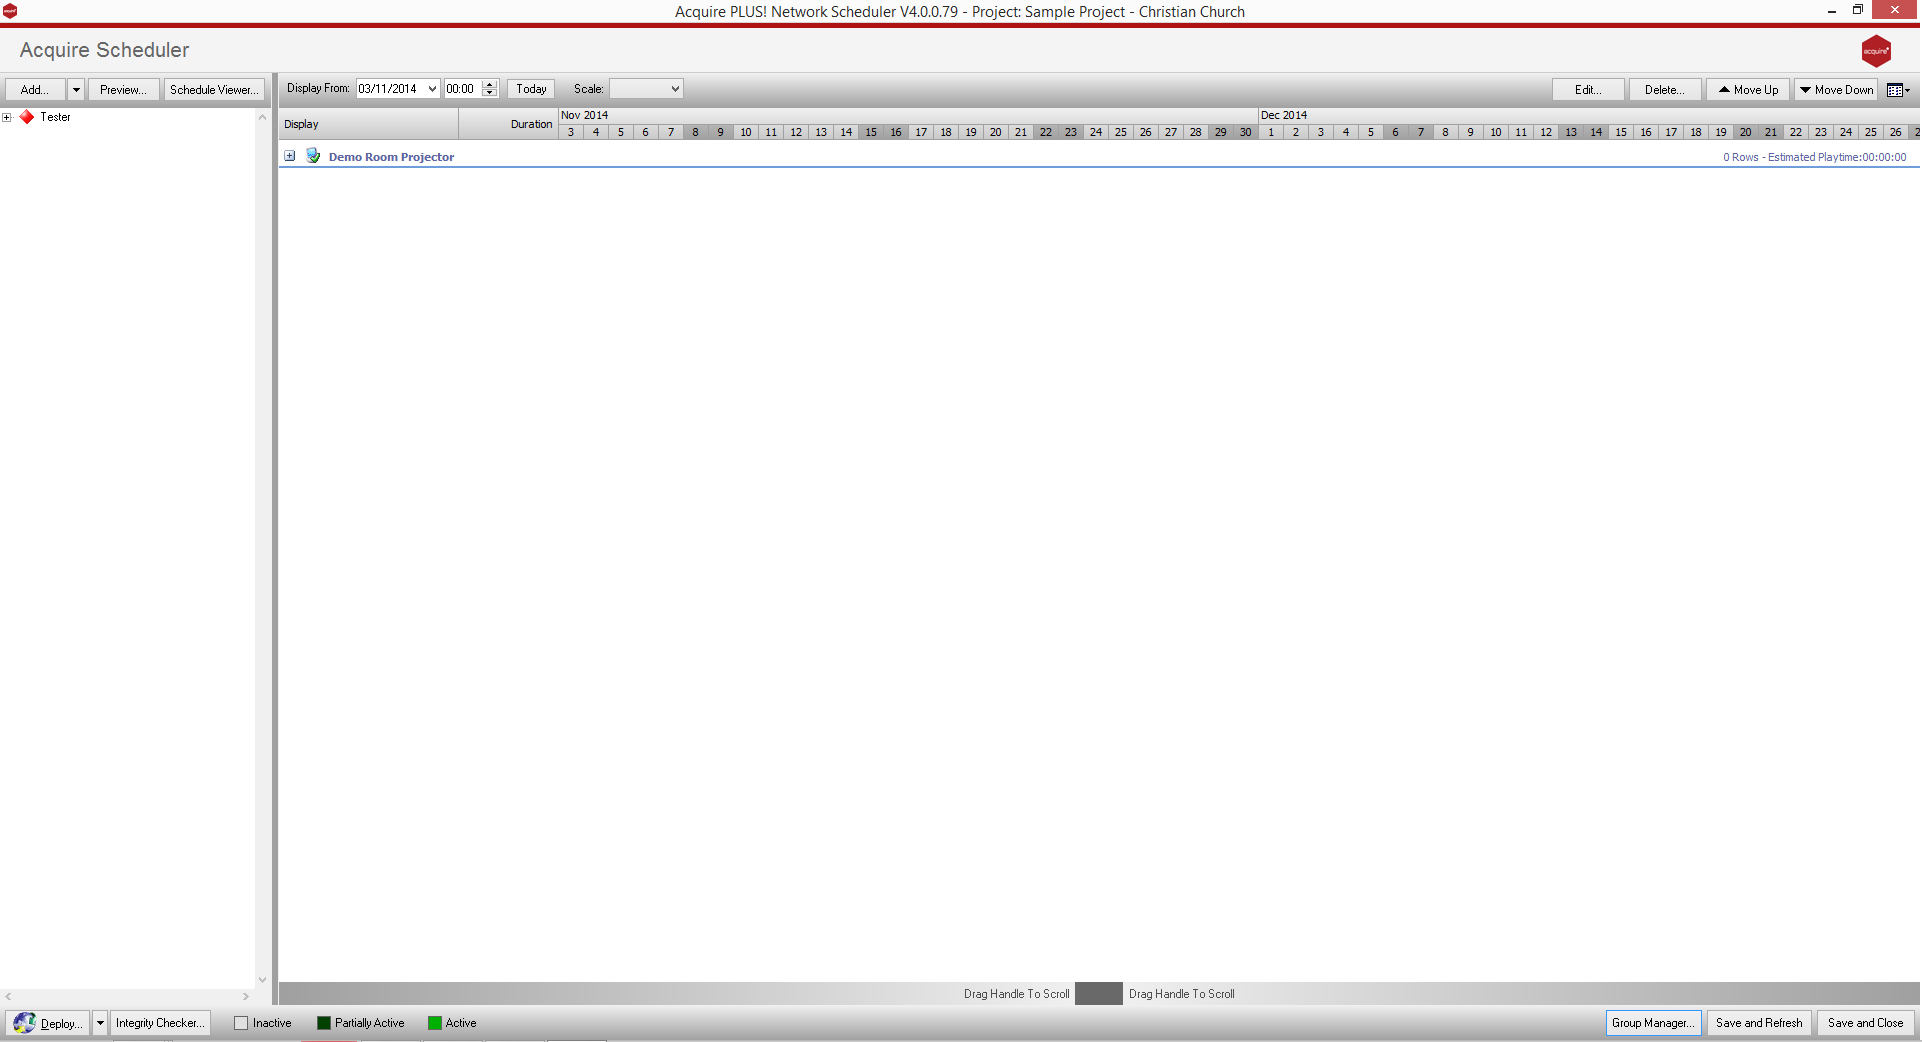
Each of your players is shown on the Group list on the left-hand side of the screen. Choose either groups/subgroups or players and press ‘Add’ to add entries to each player’s own scheduled playlist. By pressing the arrow next to the Add button, you can choose to add Media, Pages you have already created, or Scripts you have already created.
Note: that if you choose a specific player, only that player will have the entry added. However if you choose a group or sub-group, all players in that group or sub-group and those groups ‘below’ it will receive the entry you choose.
Any existing entries for each specific player are still kept, so each player can play its own combination of scripts and pages. Double-click on an entry to alter the schedule and rules for that entry.
When you have chosen the schedules for each of the players, press Deploy to send the content via the PLUS! Network to the players.
Only those files which are new or which have changed will be sent to the PLUS! Network, and from there, the players will identify the content that they require and download it automatically.
Refer to the Acquire User Manual to give you hints and to discover features you may not have realised were available. Also, make use of the Users area of the Acquire website, as it has a wealth of information in the Forum and Knowledgebase to answer many questions you may have.
HINT.
The Icon for each player shows a coloured screen for the state of the deployment, and a tick, ‘!’ sign or cross to show the status of the actual player PC.
To see more detail of the state of the player, including a history of status changes and other telemetry information, and even to remotely access the player PC to see the screen and operate it for support purposes, use the Site Manager button on the main menu.