Skip to content
English
  • There are no suggestions because the search field is empty.

Deploying the Project

Once you have edited your playlist you should deploy the project to all of the player PCs.

💡 You should deploy changes before switching playlists in the Event Mode screen. Otherwise the PC's may not have the playlists you want them to play.

Press the Deploy... at the bottom of the screen.

A dialogue with the Acquire Editor deployment methods is shown for you to select.

💡 The playlists are validated before deploy and a warning shown if there is any missing content. If you choose to deploy a project with missing content the PC's will not play out as expected. You should check the reported issues.

Point 2 Point - 
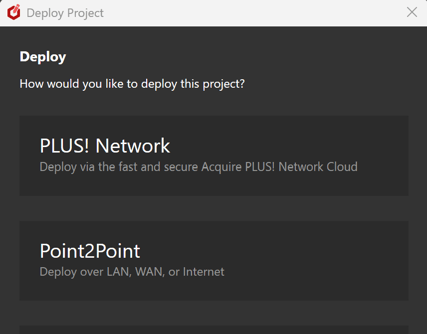
This is the typical method used for on-premise installations, allowing a completely private link between the editor and players to be maintained. It connects to each player in turn and 'Pushes' any updated content to them. Usually used in a situation when all of the players are at the same location as the Acquire Advanced Editor (although it can be used across VPNs and WANs). See below for further information.

PLUS! Network - This is a subscription service used for content deployment (a CDN) and remote support/monitoring, to remote locations It uses a resilient cloud, where content changes are uploaded to the cloud, and the players regularly check in and download the updates.

Manual - This can be used to 'wrap up' all the required files for copying to the players, either through a shared network or a USB drive. It can also be used to create a backup of the whole project.

Point2Point

As this is the typical method used, the following general information may be of interest.

Point2Point is a tool which enables you to transfer content to players on your network. It maintains a list of players, and can smartly wrap up the content, playlists, and other required files and transfer only the files which have changed or are required by each player.

Managing Players

For each of the players on your network, press the 'Add' button, or to edit an existing player, press 'Edit' or 'Delete' to remove it.

If your players are on the same network LAN segment, you can press the 'Scan' button to automatically discover the players operating on the network and add them to the list (you may wish to edit the player names after).

Otherwise, enter the IP address of the player, and optionally the name and description for this player.

The project should be auto-selected for you (but you may choose a different Acquire project here).

There is no need to choose any options for the 'On Startup' as this is used for normal Acquire Player projects.

Deploying updates

To deploy content to the players, simply press the 'Deploy' button and then select 'To all Units in current project'. It is recommended to send the files to all players rather than trying to manually maintain them. Each of the players will only play the files it has been told to do so. Although it may take a little longer, it is a good trade-off. However, if you prefer to minimize the time or you wish to just test something on a single player, you may also select the player(s) you want to update from the list and select 'Deploy' then 'Deploy to selected units'.

You will then be presented with a number of options. you do not need to choose any other options, simply press 'Create Deployment'.

The Point2Point program will contact each player in turn, negotiate which files need to be transmitted, and will transmit them. You can review the progress on-screen, and you will see the 'screen' colour of each player's icon change to Yellow as it is awaiting deployment, and to green once deployed. If a screen goes red, it shows a failure to deploy to this player. Please check the network between the Acquire Advanced Editor and the Player, and if necessary, check the logs folder on the Player.

At any time, you can review the status of the deployment in more detail by pressing the 'More Info' button on the screen. This shows a detailed log of the files being transmitted and any errors. The same information is also shown at the end of a deployment.

If you wish to check the operational status of the players prior to a deployment, you may do so by pressing the 'Check' button near the bottom of the screen. This performs a quick 'ping' of the players and reports back showing the status with a green tick or a red cross overlaid on the player icon.

At any time, you may also see a screenshot of the remote player by selecting the player and pressing 'View Snapshot'. This is a low-cpu snapshot so will not disrupt the network or smooth playout. It is updated roughly every 10 seconds.